Tuesday, July 5, 2022

Cheshire Cat Tails (copy cat)


Cheshire Cat Tails

Found at the Cheshire Café and the Lunching Pad and Cosmic Ray's Startlight Café

Written by: Christine | July 5, 2022


Have coffee, tea, or milk on hand!!! My 3-year-old LOVES the new Disney+ show Alice’s Wonderland Bakery so these were the ultimate treat to enjoy together over an episode. Little hands will love to help with this one, between the rolling and dying the icing. Make a day of it with a tea party and movie!


INGREDIENTS:

·  2 sheets of puffed pastry dough

·  1 cup of chocolate chips chopped

·  1/3 cup of pastry cream

·  1 1/4 cup of milk

·  1 ½ tsp of vanilla extract

·  1 egg

·  1 egg yolk

·  2/3 cup of granulated sugar

·  2 tbsp of corn starch

·  1 cup of powdered sugar

·  1/4 - 1/3 cup Milk

·  Food coloring (either pink and purple or red and blue to create the pinky purples)

·  Egg wash

In addition to baking pans, bowls, measuring spoons etc. some special equipment that will help is an offset spatula and a pastry brush.

INSTRUCTIONS:

For the Pastry Cream

·  Heat your milk without scalding.

·  While the milk is warming, whisk your sugar, egg and yolk in a medium bowl. Then add the cornstarch until the mixture is well combined and the color has lightened.

·  Slowly add a few tablespoons at a time of your hot milk slowly while whisking constantly until all the milk has been added.

·  Pour mixture back into the pot. Keep the heat medium/low. Stir, you do not want this to boil but thicken. It will go from very thin to thick quickly, keep your eye on it! Once it looks like pudding, turn off heat and add in the vanilla.

·  Pour into a heat safe bowl, store to cool with plastic wrap directly on the top to prevent a skin from forming.

Assembling the Cat tail

·      While the cream is chilling roll out the puffed pastry to roughly 10 x 12. Preheat the oven to 400 degrees.  Line two sheet pans with parchment paper.

·       Mix your powdered sugar with a little milk at a time until the desire consistency is reached (runny but not translucent and watery).  Separate the icing into two bowls and use coloring to get the signature pinky purple colors.

·       Once your cream is cooled, use an offset spatula to spread a very thin layer on top half of your dough (set your dough to have the shorter sides on the top and bottom).  Sprinkle your chopped chocolate on the top half of the dough. Fold the bottom half of the dough up to the top half so the shorter sides are touching.


 Cut (a pizza cuter is best here) 5 strips from each dough rectangle.   Lifting from the top and bottom of the slice, pick up the tail and twist once or twice and place on the sheet pan. (Complete with the rest of the slices).  Brush the twists with egg wash (1 egg, 1 tsp. water mixed up with a fork).


      Bake for 18-20 minutes.  Let cool for 5 minutes in the pan, remove to a rack and cool for 5 more minutes. Use a fork or spatula to drizzle the colored icing in a back-and-forth motion.

Enjoy!


Wednesday, June 29, 2022

Minnie Mouse Birthday Party!


Minnie Mouse Birthday Party

Written by: Christina | June 29, 2022


This past weekend we celebrated my daughter's 1st birthday!! She is OBSESSED with Minnie Mouse so it was an obvious choice for the theme.  I wanted to make it a little different so instead of the normal pink and black color scheme I went with all pastel colors.  Some of the things I created require a Cricut or other cutting machine but I'be included any links that might be helpful for planning your party!


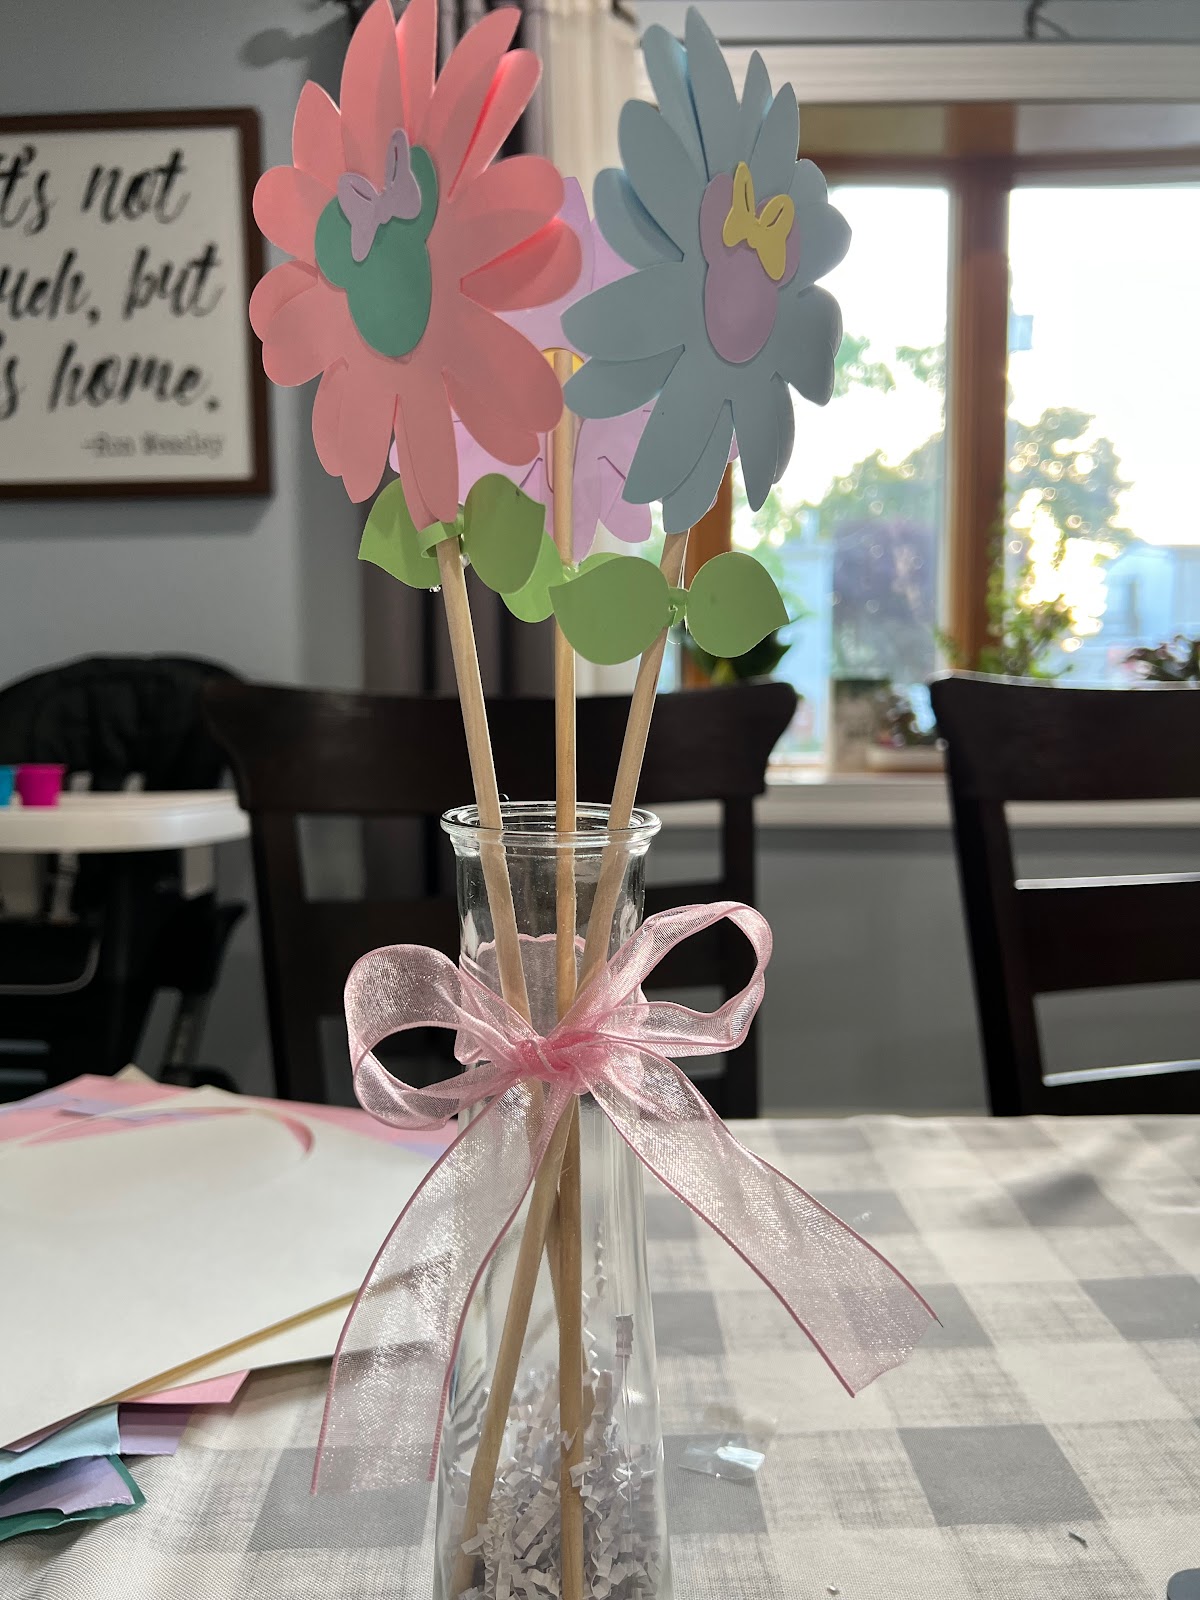
Center Pieces:  Minnie flowers

These were such a small detail but I love how they came out! I used Cricut design space to create them and Cricut to cut them.  Then used dowels and a Dollar Tree vase!


Banners:

1. Month Banner: 

Ordered my photos and designed the banner on Cricut


2. Happy Birthday Banner: 

Designed and cut on the Cricut


3. Highchair Banner

I of course didn't get a photo of her in her highchair with this banner but I loved it! Designed and cut on the Cricut.


Dessert Table: 

The dessert table came together so well.  The balloon arch I made myself using a kit from Amazon.  The cake stands and cupcake holders are from Party City.  We made the cupcakes ourselves using melting chocolates for the ears.  


Balloon Garlands (and Minnie cut out): 

We made the balloon garland using the kit from Amazon and the cut out is from Party City.


Goody Bags: 

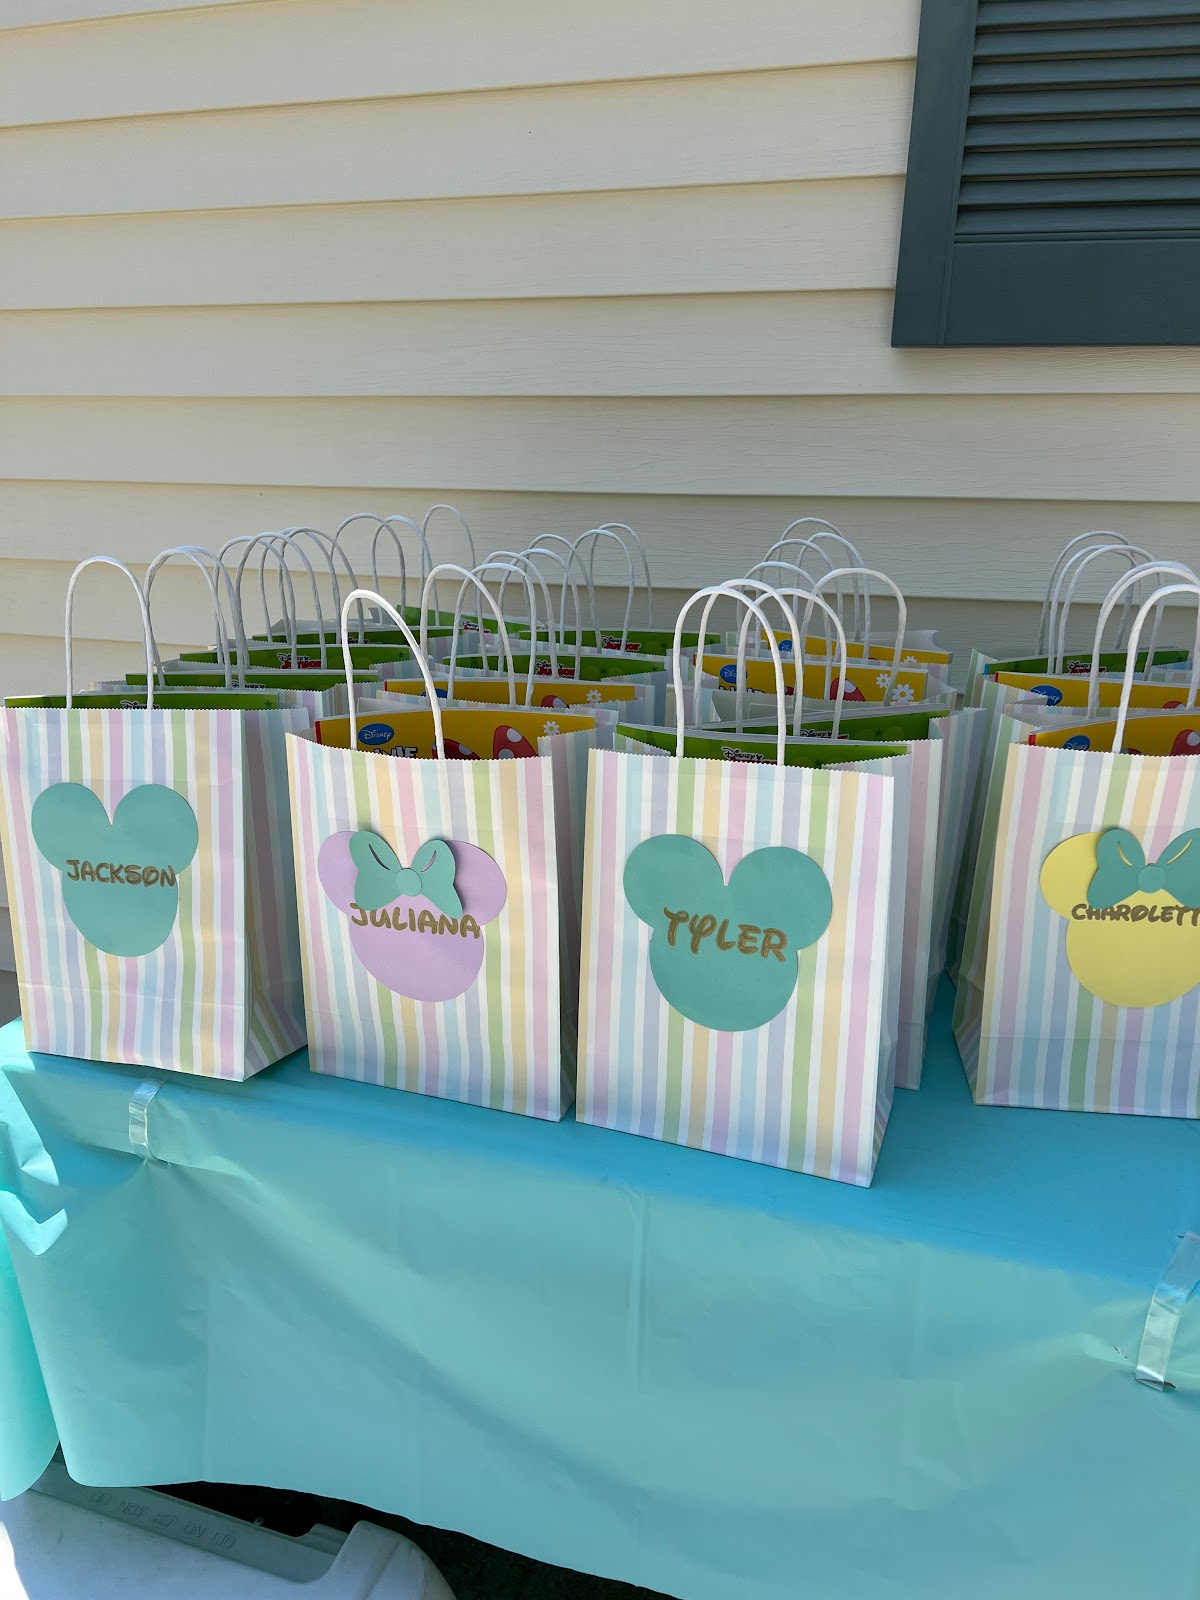
Bags from Amazon.  Mickey and Minnie cut out and names were done on the Cricut.  They were filled with Mickey and Minnie ears, coloring books, stickers, Disney crazy straws and more. 

Disney Stickers


Coloring Page: 

This was a hit! The kids kept stopping by to color it throughout the day.  


Pom Pom Mickey Garland: 

I saw these pastel Pom Poms at Michaels and knew I had to do something with them I just loved the colors so much.  So  I hot glued some Mickeys together and used a large needle and some thin twine to string them and make little garlands that I used around the house for decorations.


Monday, May 16, 2022

Cream Cheese Stuffed Pretzel


Cream Cheese Stuffed Pretzel

Found at Tomorrow Land's The Launching Pad

Written by: Christina | May 17, 2022


So one day I found myself in a conversation with two amazing employees at The Sunglass Hut in Magic Kingdom.  One of the two ladies told me her favorite snack in all of Disney World was the cream cheese pretzel.  I considered myself someone who really knew Disney yet I had never heard of this elusive pretzel.  She said it was only sold at The Launching Pad and she often goes after work to get one because they are incredible.  Well this last trip I was determined to try it and my oh my I get why she raved about it.  We actually got it twice that trip.  These homemade ones are possibly even better!


Ingredients:

Pretzel dough

1 cup hot water

1 Tbsp light brown sugar

1 Tbsp granulated sugar

2 1/2 tsp active dry yeast

3 Tbsp unsalted butter (melted)

1 tsp salt

3-3 1/2 cups all purpose flour

1/2 cup baking soda

1 egg


Cream Cheese Filling

8 oz cream cheese

2 cups powdered sugar

1 tsp pure vanilla extract


Topping

3 crushed graham crackers


Directions:

1. Whisk the water, brown sugar, granulated sugar, and active yeast together in a large bowl. Let it sit for about 5 minutes or until the yeast starts to activate and puff up.

2. Stir in the butter and salt then gradually add in 2 1/2 cups of the flour stirring the entire time.

3. Turn the dough out onto a well-floured surface using the remaining flour.  Knead for 10 minutes.

4. Scrape out any remaining bits of dough in the bowl and grease it well with butter then place the dough inside the bowl and lightly grease the top of the dough as well.

5. Cover with plastic wrap and place in a warm space for about one hour or until the dough has doubled. 

6. Using an electric mixer, mix the cream cheese until smooth then add the powdered sugar and vanilla and mix until combined.  Put cream cheese mixture in a large zip lock and put in the refrigerator while dough is rising.

7. Preheat oven to 425 degrees Fahrenheit and line a large, baking pan with parchment paper.

8. Once the dough has risen, divide the dough into 6 equal pieces then roll each piece into an 18-inch rope.

9. Use a rolling pin to flatten out the rope to about 2 inches in width.

10. Take out the cream cheese mixture.  Cut the corner of the zip lock bag.

11. Pipe out some cream cheese down the center of the flattened pretzel rope, leaving about a half inch space on the ends without cream cheese.

12. Pinch the sides together and pinch the ends as well then gently press down the pinched areas.

13. Gently roll the rope to soften the pinched areas.

14. Boil about 6 cups of water in a large pot over high heat.  Once water is boiling add the baking soda.

15. Add the first pretzel to the boiling water. Take it out after 30 seconds and place it on the baking sheet.

16. Repeat the process with the remaining pretzels.

17.  Whisk and egg with a little bit of water and brush it on the top of each pretzel.

18. Bake for 10-12 minutes or until light and golden on top.

19. When pretzels come out of the oven sprinkle some of the crushed graham crackers on top.


Saturday, May 7, 2022

Copy Cat Kona Café Macadamia Nut Pancakes

Written by: Christine | May 7, 2022


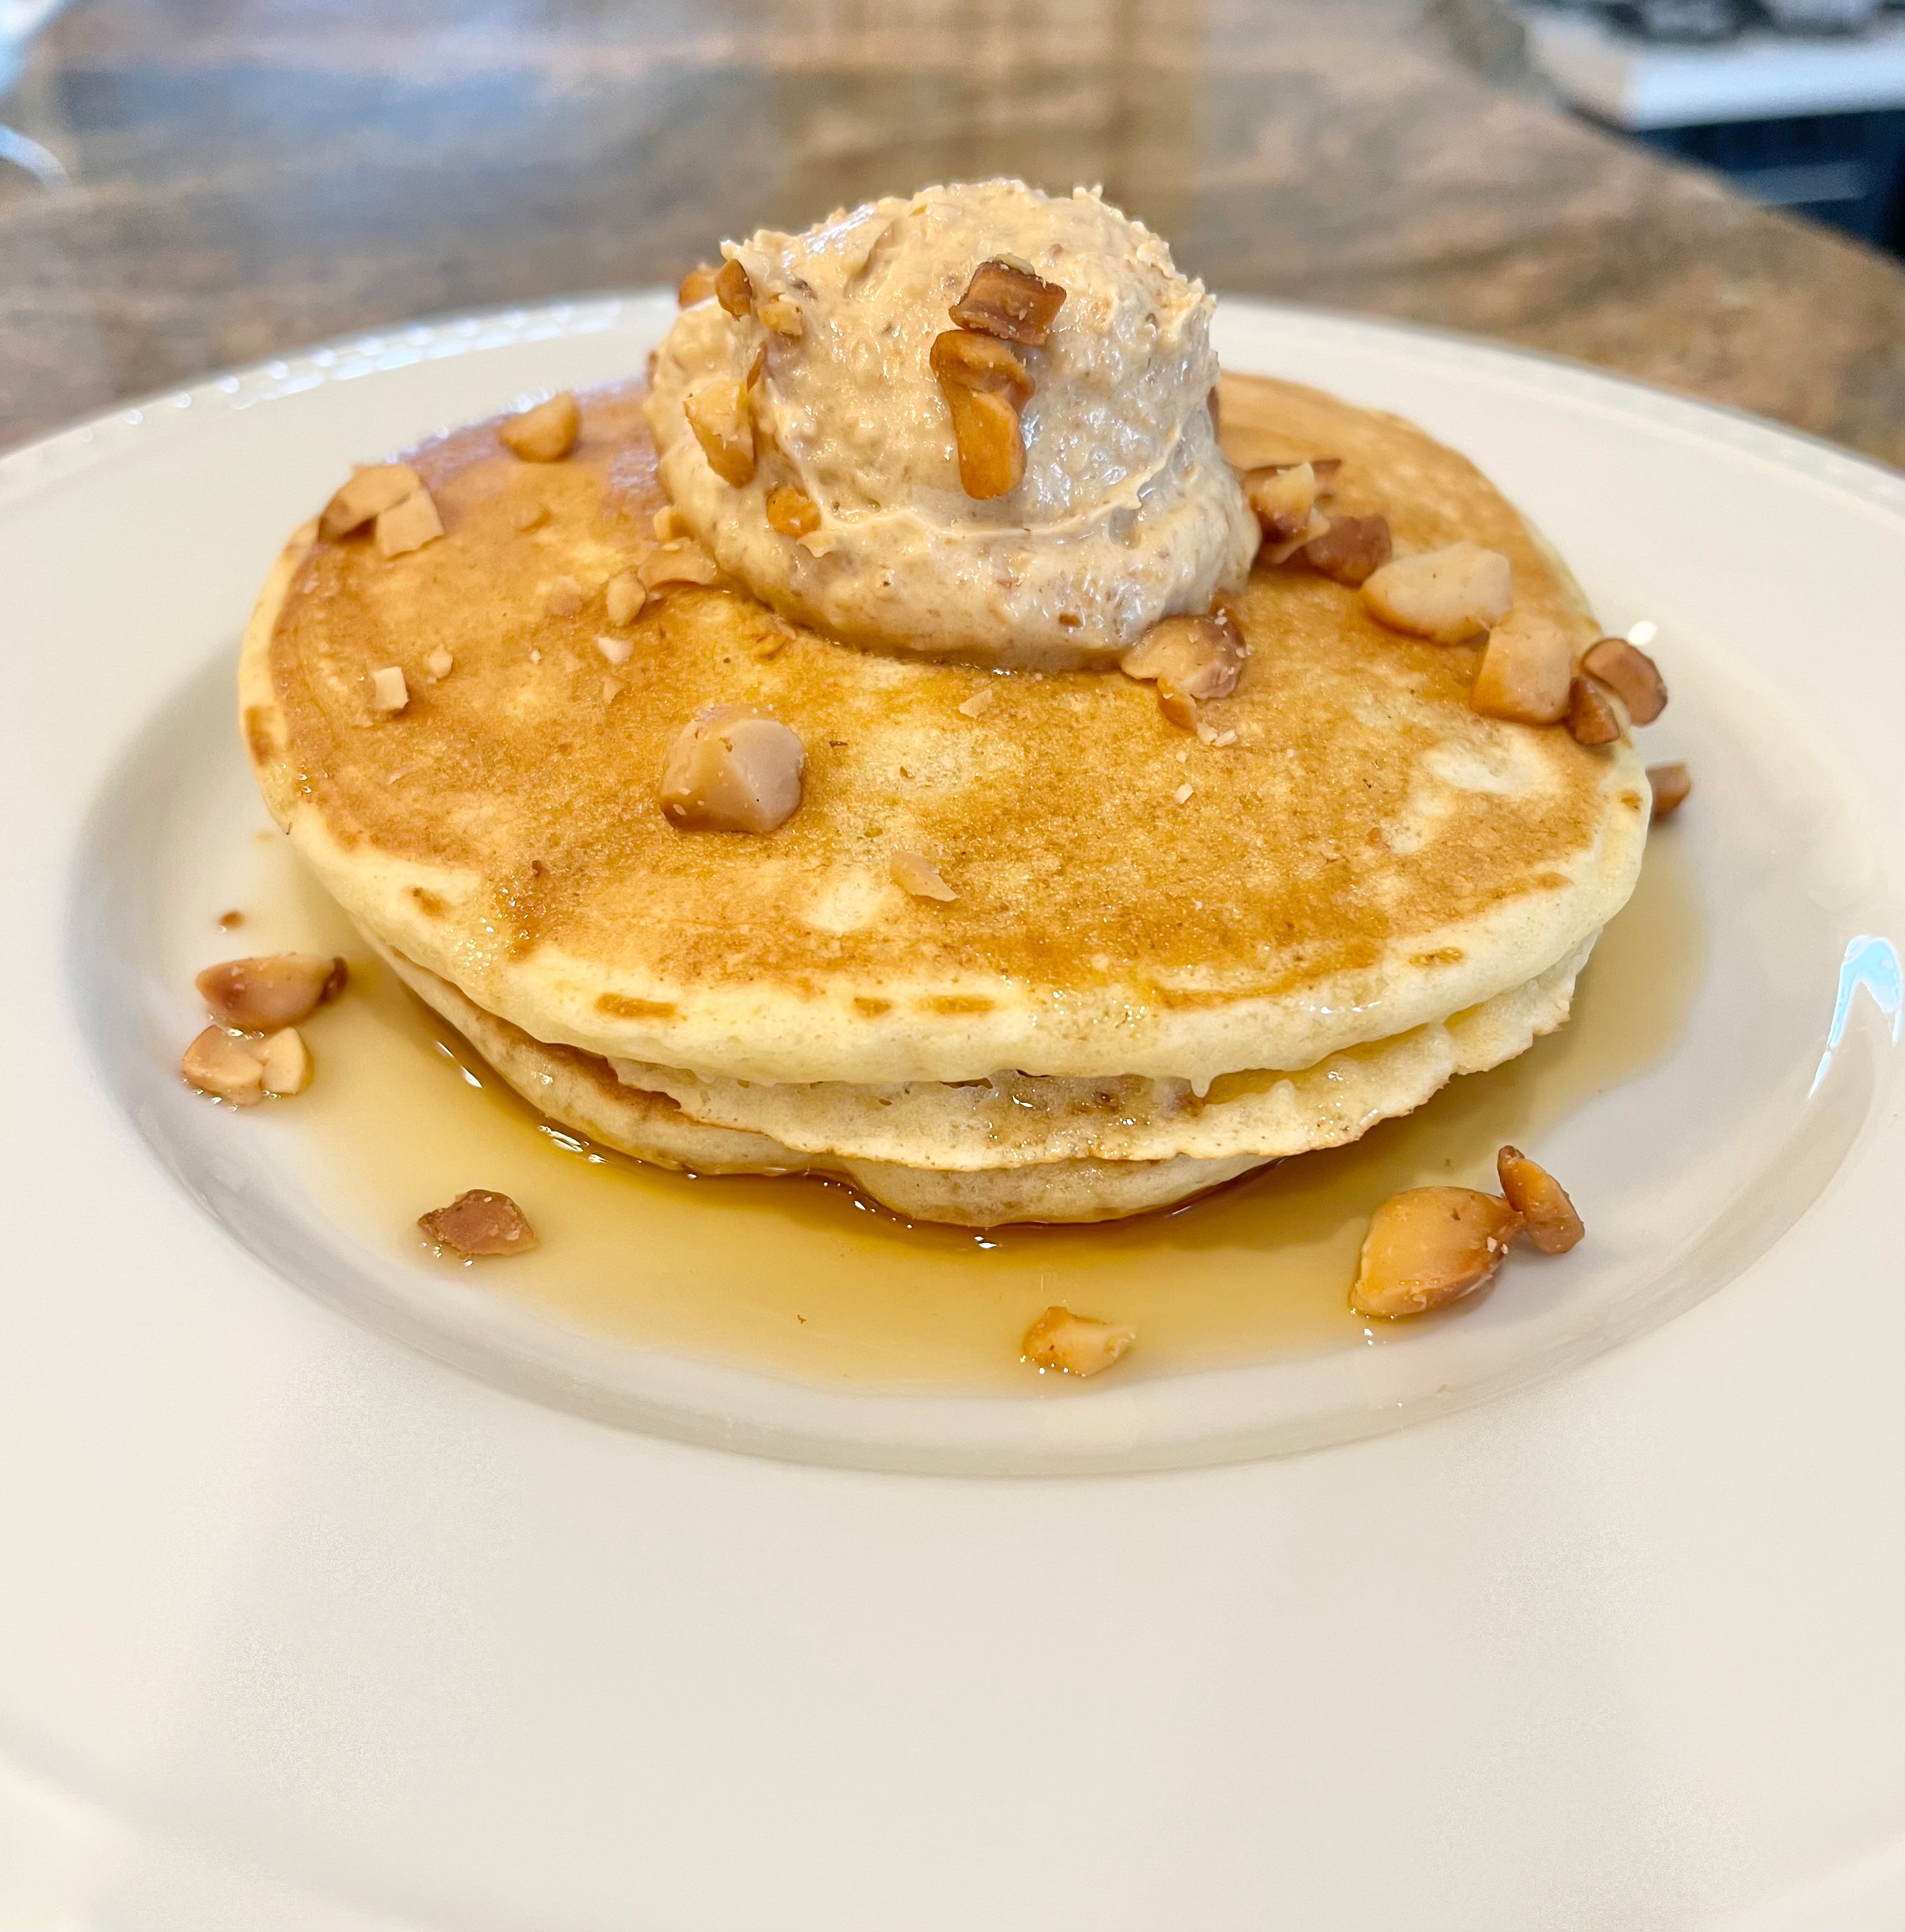
Okay, Tonga Toast is very good but...when we go to Kona Café we order the Macadamia Nut Pancakes and the Loco Moco! A plate of these fluffy pancakes with crispy bacon, a Liliko'i mimosa (iykyk) and a press pot of Kona Coffee is pretty much heaven on earth for us. Good news, you can recreate them at home easily and with a couple edits we actually think it may be better than the original(mostly bc we can wear our PJs while we're enjoying these). 

Makes about 14 4 inch pancakes (this recipe works well halved)

What you need:

*A scoop and griddle make this a breeze

Ingredients

Pancakes:
  • 2 cups of flour
  • 2 TBSP brown sugar
  • 2 tsp kosher salt
  • 5 tsp baking powder (yes 5)
  • 2 large eggs
  • 2 1/2 cups of milk (we used whole)
  • 1 tsp vanilla
  • 6 TBSP melted butter

Macadamia butter:

  • 8 TBSP unsalted butter
  • 1/3 cup toasted chopped macadamia nuts
  •  1/4 cup honey
  • 1/2 tsp kosher salt
  1. Use a food processor or blender to chop the macadamia nuts into almost a paste.
  2. Add the butter and honey until it has emulsified into a smooth and light butter spread.
  3. Salt to taste and place in the fridge(*Note, this can be made the day ahead, it may even be better)
  4. Sift the flour, sugar, salt and BP into a large bowl. 
  5. Whisk the eggs in a medium bowl, add the milk and vanilla and whisk until combined. 
  6. Make a well in the dry ingredients and pour in the milk mixture. Stir gently. 
  7. When this is just about combined, pour in the melted butter. Stir until mostly combined but lumps are fine, we don't want to overmix (overmixing until everything is totally smooth is how you get tough pancakes). 
  8. Using a scoop, drop about 1/4 cup of mix onto a warm griddle. 
  9. When your pancaked start to have bubbles, check and flip. (about a minute)
  10. When the other side is golden, remove to a plate and keep warm in a warm oven on an oven safe plate.
  11. Stack 2-3 pancakes on a plate, top with warm syrup and put a small scoop of macadamia nut butter to serve. 


Monday, May 2, 2022

Star Wars Sensory Bin

 Star Wars Sensory Bin

Written by: Christine | May 3, 2022


If your little ones are anything like ours, they love to explore through sensory play! Sensory Bins are so popular right now and have so many benefits for development in tons of areas like fine motor skills, language and creativity. You can use items you already have and things from your pantry. We love using dried beans, rice, chickpeas (all of which can be colored using food coloring to match your theme), kinetic sand, playdoh and water. Check out this special "May the Fourth" version below with links to recreate it at home! 

*Always supervise your younger ones closely if they are still in an "everything in the mouth" phase and choose taste safe options. 

Here is a fun bonus; there is not a whole lot of toddler friendly Star Wars content. Lego Star Wars episodes can even get a little scary for the under 5 crowd. Introducing the characters and universe in play may help your kids recognize and get excited to spend time at Galaxy's Edge so you can enjoy and explore there together! We like to start off with a book to draw together the theme and add special language to the play. For this activity we found this low cost and adorable option. 


What you'll need:

Black beans~ 4lb bag for "space" 
Playdoh 
Sensory tools (This set is great but we also have found great scoops and tongs and cups at the dollar store)
Glow in the dark stars
Light sabers (glow bracelets) 

*We had purchased this bath toy set on our last trip and have seen them in Target since but they appear to be sold out right now

We recommend checking out our Cold Brew Black Caf remake and sipping on that treat while your littles explore a galaxy far far away.  Get ready for hours of fun! 


May the Fourth be with you!

 Galaxy's Edge Cold Brew Coffee Black Caf

Written by: Christine | May 3, 2022


You could spend May the Fourth being mad that this treat is only available in California or you can use our research to create the most delicious "from afar" version! There are a lot of copy cat recipes and honestly they are all tasty. But some with a sweeter result or a denser foam. Mascarpone vs. Cream Cheese, Simple Syrup vs. Sugar, which cold brew to use? We did the trials and have a definitive favorite. Check it out and let us know what you think! 

Makes 2

*Special equipment: milk frother (blender will work)

Ingredients:
12 ounces Cold Brew
2 cups of ice
1/3 cup mascarpone
1/4 cup half and half
2 tsp simple syrup
1/2 cup Cocoa Puffs

  1. Make the foam first by frothing the half and half, marscarpone and simple syrup
  2. Divide the ice into two glasses
  3. Pour cold brew over ice leaving an inch or so at the top of your glass
  4. Pour your foam atop your coffee
  5. Sprinkle with cocoa puffs
May the Fourth be with you!


DIY Rapunzel Ears


DIY Rapunzel Ears

Written by: Christina | May 2, 2022


How fun are these ears?! I love something that you can wear to the parks that starts off adorable for day time then lights up for nighttime fun! Best part DIYing your Minnie Ears is choosing your own headband! I have so many ears that I purchased from Disney, of course I still wear them, but they bother my head. Making my own meant I got to test out the headband first! 

Anyway, yes my ears have a Rapunzel vibe when it comes to the color but these ears can be made into any color combo or style you'd like.  Tropical flowers for Poly vibe, black and deep purple flowers for a Haunted Mansion look, the combos are endless!


What you need:


Hot glue gun and glue sticks
14 gauge gold wire
Wire cutters
Fairy lights (battery operated) I used multicolored but there are tons of options
Faux flowers


Directions: 

1. Find something round that is approximately the size you want your ears to be.  For me this large 40 oz water bottle I have was perfect.  Take your wire and measure out your circles.  Leave a little extra wire on each.


2. Take the ends of each wire circle and bend them outward.  I used my wire cutter for this but pliers would work too.
 

3.  Hot glue the ears in place.  Hold them until the glue dries or balance them on something so they stay in place (this is the trickiest part).


4.  Glue the battery pack in the middle of the ears.  Take the fairy lights and wrap them around the ears.  I found it easier to do with the lights on.  I wanted to make sure I had equal lights on each ear and they're easier to count when the are on. 


5.  Glue the flowers wherever you would like.  Obviously do your best to cover the battery pack.  I included flowers on the front and back.  


Irish Soda Bread Mickeys

  Mickey Irish Soda Bread Written by: Christine | March 2, 2023 Ingredients: 4 1/2-4 3/4 C. AP flour (plus more for rolling out) 1 tsp. baki...